BSV 1172, Chapter 2: Getting Burned, and Seeing Green
In this chapter, I’m going to focus briefly on some flaws that can occur while shooting, and when simply buying a tube video camera.
Ebay and various auction and listing services like Craigslist feature a decent variety of used (aka vintage) video gear, but like buying a used car, you’ve no idea what the previous owner did with the unit, whether there’s been any modifications, or how well it was treated. Actually, let’s back up a bit, because what you’ll commonly find in online sales is something bought by someone who may or may not have an idea what they have, or lacks the ability or judgment to really assess the unit’s state of affairs. Something can look great cosmetically, but inside it could be something quite else.
A not-so-short preamble
In my original quest I wanted a decent tube camera, and after doing some early research I settled on something made by Panasonic, since they re-badged their line of cameras for a variety of companies with sometimes very slight differentiations in design (often just a change in case colours, logos, and maybe knob placement).
YouTube has lots of clips and short tests of people shooting a few minutes of footage with vintage gear, and Vimeo features a melange of experimental and hybrid tube / digital productions, but they’re often short on details (in terms of what exactly was used to acquire the images, how were they processed and mastered digitally, etc.) and the videosdon’t reveal the camera in its optimum performance environment. By that I mean shooting something indoors and outdoors under ideal lighting situations so you can see balanced colours, clarity, and fluid camera movements. And things in focus.
Even if you’ve recently acquired a vintage broadcast quality camera (which are also out there), it’s still tough to know how to get the best images unless you’ve some expertise with lighting and camera handling (and that expertise can easily extend to amateur shooters, prosumer users, and hobbyists). Put another way, if it’s winter, it’s unlikely you’ll be able to find lush green grass and sunlight to capture all those gorgeous colours of a garden. If you live way up in an apartment, besides lovely city panoramas, you’re somewhat restricted with subject matter unless you take the camera elsewhere, and herein likes the chief problem with these cameras: portability. Not in terms of size and weight (there some elegant but unwieldy examples that I’ll detail in a subsequent production & blog), but their original design.

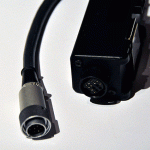
Before the camcorder, camera + video recorder came in two parts, separated by a cable which was sometimes manufacturer-specific. For example, you couldn’t plug Sony’s HVC-2800 camera into a Panasonic VHS deck directly because Sony used a 14-pin plug instead of the more widely used 10-pin variety. (Like Apple’s ingenious mindset, you could buy an adapter to connect a Sony camera with a rival manufacturer’s recorder, or a rival manufacturer’s recorder to a Sony Betamax recorder.)
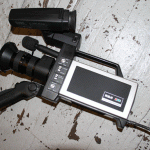
Perhaps the most unique bridge design that preceded the fully-integrated camcorder for consumers was JVC’s modular SP-3 unit, which accepted a camera into its housing along with a separate VHS-C deck. You could buy the camera (a GZ-S3) & recorder separately, but for a few bucks more you could also get the housing and integrate the two into a camcorder.
This modular system sounds bizarre, but it’s not dissimilar to the inherently detachable designs of professional VHS and S-decks which could also detach from lenses and batteries – one reason you’ll see ‘leftover’ bits on ebay, especially stubby recorders, missing everything else, including cables.
JVC’s GZ camera series sported a Saticon video tube, which was the predecessor to the Newvicon and older Vidicon tubes. There’s a lengthy Wiki on each tube’s development and technical characteristics, but for anyone interested in getting a tube camera, alongside Sony’s Trinicon tube, these are the main types you’re likely to encounter within the consumer realm, and their qualitative differences are significant.

BSV 1170 was filmed using a Canon VC-50 Pro which is essentially a suped-up Panasonic with a better Canon lens and auto-focus design, plus a High-Band Saticon tube that (presumably) gives a cleaner & more accurate picture than a standard Saticon tube.
Canon’s website features an archive of some vintage cameras, but the VC-50 isn’t listed, perhaps because it was aimed at the prosumer market instead of the slightly upscale consumer. Instead of the 5MHz tube that came with the VC-10, 20, and 30 models, the 50 featured a 6MHz tube. Panasonic did make their own line of pro-styled cameras with a slightly bigger camera design, but without having one, I can’t say how they compare.)

The Canon VC-50 shares the same lens system as the lower-line Panasonics (plus the re-badged units made for companies like Olympus, GE, and Quasars). The lenses are great and feature the same standard 58mm thread that allows you to slap on specific lenses from Canon’s own Super 8 film cameras, but the focus ring is clunky and any set focus is easily offset by just a slight nudge.
What Canon did do correctly was move the auto-focus sensors to the right side. Prior Panasonic designs placed the send & receive sensor panels centrally above & below the lens; therefore, when you attempt a smooth focus or zoom, your finger hits the upper sensor and interrupts any smooth transition.
Most auto-focus systems on vintage cameras are very primitive. This 1983 RCA dealer promo (jump tp 6:32) for their own set of tube and CCD cameras shows how it works: camera sends an infra-red signal out to a target, and the second sensor gets the bounce-back and figures out the focus setting. Things did not improve even a decade later: when you plopped a Sony Hi8 camera (or any camera, really) in front of a blank white wall, even when completely stationary, the auto-focus would rack back & forth, shifting focus as though it was tracing a ghost, or was just bored and wanted to play with itself.

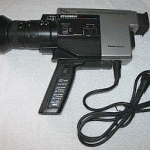
Older RCA cameras made by Panasonic, like the CC010, have no auto-focus feature. It’s a 1982 product, but the trade-off is a gorgeous lens in a pro-styled metal housing with smooth focus & zoom features, and having a 58mm thread, it will accept some zoom and wide angle extension lenses. (There’s basically three types plus an assorted filter package, but these were not unique to RCA, as Sony and Canon had their own – and very similar – variants.)
What I like about RCA is how the lenses were supposed to work on new and select older cameras, which for collectors means you have to know which cameras were compatible, as (ideally) those are the ones you’ll likely want since they offer the most accessories. I’ll have a short piece on the RCA lenses (since I used them on the short film) plus a scan of RCA’s brochure which lists all of the exceptions.
Back to tubes, dammit
My Canon VC-50 was purchased from its original owner, who used it for various videography assignments, so I got lucky in terms of getting a manual and several cords, cables, and remotes which, being a suped-up Panasonic, do work with some Panasonic gear (even a re-badged as Quasar). The seller was willing to do quick tests to make sure not only the lens was clean – no scratches, fogging, etc. – but also check the picture being output. This was important because my first effort to snag a VC-50 yielded a well-worn unit which the seller was able to power up, but his checks were rudimentary: the viewfinder worked, the lens looked clean from a cursory glance.
In actuality, the zoom motor was dead, the lens has two grievous gouges that affect the image when in macro mode, and worse of all, there were 3 dead pixels with side flare marks, and two smaller dead pixels.

Part of that otherwise economically priced package included a great VCR + dock and camera case, but herein lies the blurry realm in which buyers have to be careful. Buying anything used is a crap shoot, because if the seller isn’t camera-savvy and just snapped it up from a Goodwill shop for $10, or got it at an estate auction, he or she has no idea what constitutes good working order. Secondly, they may even lack the gear to power it on. Cameras show up online in various bits & pieces because they may be cast-offs from an equipment upgrade. If a family moved up to a far lighter CCD camera, the tube unit went to the closet or garage. If the VCR died and the upgrade was a camcorder, the tube camera became a doorstop, because without the VCR that fed the camera power through the aforementioned 10-pin connector (or a separate power supply / breakout box), there’s no way to turn on the camera. In more bizarre cases, cameras sold lack any cables, perhaps because it cords were cut off and cannibalized for another unit, or used to extend shorter cables.
The viewfinders, which generally sported B&W images – RCA’s CC031 CCD camera featured a colour viewfinder, and Canon apparently offered an optional colour variant for its VC-10 to 30 series – may not be present anymore, either due to loss, damage, or death (since the viewfinders essentially use a tiny B&W TV tube).
So, while the first Canon VC-50 was ‘tested’ bu the seller, it nevertheless was a beater, and its dead pixels are featured in a short video I’ve edited and posted on YouTube in case anyone can readily tell whether the artifacts are cause by the tube, the circuit board, or maybe a dead capacitor. I’ve also chosen to start the video with a short montage of the nightmare scenario facing anyone that chooses to film a short using a tube camera: the dreaded burn-in.
Basically, if a tube is exposed to bright light for a lengthy period, that streak or after-image can / will be permanently imprinted on the tube. The prior generation of tubes – Vidicons, as in RCA’s CC010 – were notoriously vulnerable to bright spots. If a car drove by with a bright spot from the chrome bumper glowing across the screen, you could get an after-image that resembles someone taking their finger on a foggy pane of glass, and dragging a jagged dark line across the screen. Note permanent trauma in this short sample.
In a test I did, a minor streak from a distant lamp took about a minute – one (1) minute – to fade, but if aimed at a bright light (er, the sun), you get permanent damage and the tube will always display that cartoon streak. Given these are essentially antiques, you don’t want that to happen… but mistakes can occur.
During the shoot, we lined up the camera with the Canon wide lens attachment to capture a ceiling-level shot of the video store. I flicked on & off the lights for what will be an arty-farty montage. What neither myself nor the cameraman saw was the halogen lamp aimed squarely at the lens, along with an adjacent lamp at a similarly lethal angle. Saticon tubes were designed to be less sensitive to bright spots and yet, as the video shows (you have to watch it in 720p HD to catch the details), shit happened. What appeared in select shots for the rest of the shoot resembles a dried water splotch on the lens.
I’ve edited the video, titled Vintage Tube Camera Quandaries: Burn Spots, Dots, and Splotches, in case 1) anyone has further details & suggestions on how to solve the problem; and 2) as a cautionary catalogue of what can happen when even the most careful of attention lapses for 30 seconds, or less. Also in the video are examples of something you may find on well-used cameras featuring Newvicon tubes.
Newvicons (the Saticon’s predecessor) boasted better low-light sensitivity, but professionals poo-pooed their smearish colour capturing, and severe comet-tailing – where bright lights light a lamp or car headlights leave comet-like streaks across the screen instead of dark finger smudges. It’s an interesting artifact that, when NOT sunlight or grievously bright light, aren’t permanent, but while I don’t have any stats, at least from the cameras I’ve sampled, heavy use of Newvicon cameras may yield a large green spot in the frame’s centre and edges. Translation: of the ones I’ve bought, only one – a virtually pristine Panasonic – produces a clean picture. The rest have problems with colour registration, and in severe cases, green spots.

There are two pieces of advice I’ve read that may solve the issue of burns and discoloration: for old black & white Vidicon cameras, aiming the lens at full aperture towards a brightly light white card for a lengthy period might ‘burn-out’ the finger streaks; not sure what to do for the colour variant.
For Newvicons, perhaps doing something similar with a green background, although as this chapter (see pages 55-56) from a vintage video production guide details, the procedure may shorten the tube’s life and / or ability to pick up a broad range of detail.
With the variety of problems that can arise when using, as well as buying, tube cameras, the obvious question us why bother with the cameras in the first place? What aesthetic benefits can they offer which can’t already be reproduced, even marginally, using software?
I’ll answer those questions through visual examples in follow-up posts instead of prose, but let me close with a final comment on the issue of portability, because that was a major problem in dealing with any kind of exterior filming. How you decide to power the camera and onto which kind of media you record your footage are perhaps the primary concerns, regardless of whether you’re using a two-part system or a full camcorder.
The cost of the VHS VCR’s battery varied between $50-100+ when you factor shipping. A used Betacam deck + tape stock + battery supply was prohibitive, and even if I had opted for a used S-VHS deck / stock / battery, there’s no guarantee the recorder would work, as pro and prosumer decks tend to get worked to death before they appear on the resale market. Additionally, you’d need an adapter cable because late model pro decks generally don’t accept 10-pin camera connectors.
A surviving full camera prosumer package (camera, case, cables, power supply, manual, and battery) sells for a premium, and it’s not common to find a recorder that similarly includes cables, case, batteries and especially manuals, so you’d be spending a lot of time researching the parts using scant info online culled from bits & pieces of available free manuals (often not for the models you’re after), and running through various cost scenarios to see what could be assembled within a short period of time for a reasonable budget.
The other option was to get a digital recorder, but many of the formerly affordable units made by Sony have been discontinued, and the best sell used between $300-$600. Pro-level recorders are much more, and are only worth buying if you genuinely plan to use a mix of old and new gear consistently, and want to master every frame of footage at its best before degrading and mucking around.
For my film, the most affordable option was using a standard Toshiba DVD recorder to capture the footage, but powering all the gear for exterior shots would’ve been insane: a camping power supply with cables extended to a home DVD recorder, a VHS recorder, and the tube camera. Since 99.9% of the film was going to be shot indoors, there was no need to use more than what I already had at hand. Depending on the aesthetic success of the doc and subsequent projects (not to mention any, ahem, revenue to recover key expenses), I’ll consider a portable pro digital recorder. Maybe in late of 2013, or the sudden marriage to a rich & benevolent wife.
The next chapter will be up in a week or so, but this is just a hint of the challenges (er, headaches) one can face when not using a lightweight HD camera (or vintage Hi8 camcorder, for that matter) with plenty of internal options.
Shooting in an environment wholly lit by non-deluxe warm white fluorescent bulbs with severe radio wave and electrical interference from power lines, lighting, a security gate, and an adjacent generator room adds to the complications when a tube camera’s design makes it an unwanted receptor, if not a magnet for noise… unless that happens to worth for your predetermined aesthetic of adding analogue noise to the raw footage…
Mark R. Hasan, Editor
Big Head Amusements
